
Step 1
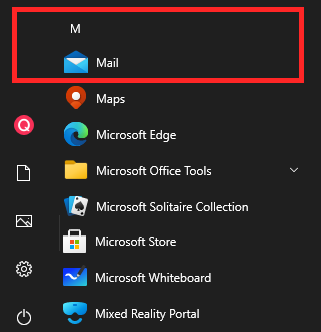
Firstly, you’ll need to open Windows 10 Mail by clicking on the Start button, then clicking on ‘Mail‘.
Step 2
If this is the first time you’ve opened the Mail app, you’ll see a Welcome page. Select Add account to get started.
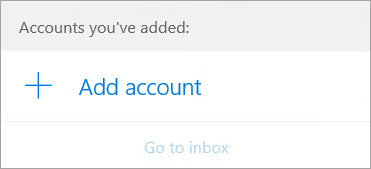
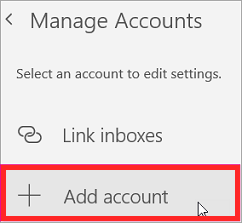
If you’ve used the Mail app before, at the bottom of the left navigation pane, select Settings  , and then choose Manage Accounts.
Note: On a phone or tablet, tap the three dots at the bottom of the page to access Settings.

Step 3
Select Add account.
Step 4
Choose Other Account – POP IMAP.
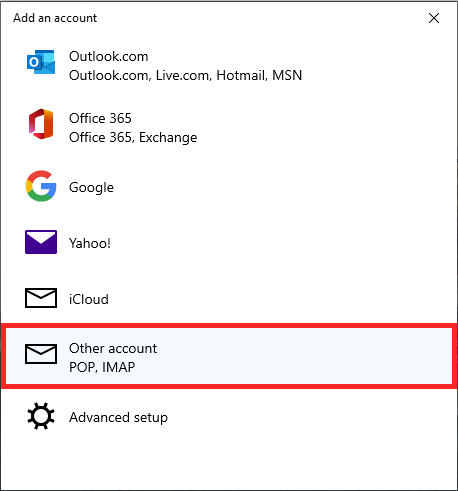
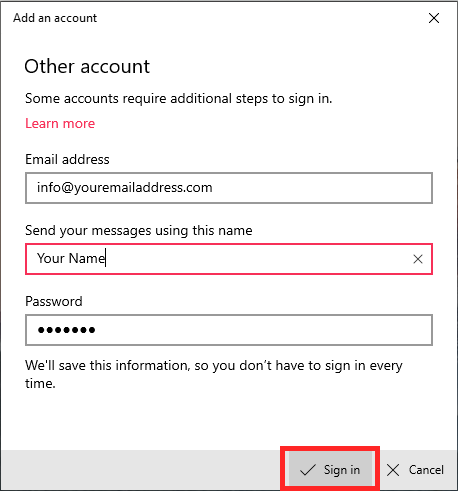
and enter your email address, name and password.
Click on Sign in and you should have access to your email account in few seconds.
If, for some reasons, the above process fails.
You will need go back and select Advance settings from the ‘Add an account‘ section.

Select Internet Email – POP or IMAP

and fill the details as per the instruction below.
Click on Sign in and you should have access to your email account in few seconds.

Additional Notes:
There are various methods of connecting to mailboxes on our platform. We always recommend IMAP as that helps keep messages in sync between various devices and our webmail system.
This is our recommended configuration for Windows Mail.
Incoming Server
Server Name: imap.stackmail.com
Username: Your e-mail address
Port: 993
Connection security: SSL/TLS
Authentication method: ‘Normal password’
Outgoing Server (SMTP)
Server Name: smtp.stackmail.com
Username: Your e-mail address
Port: 587
Connection Security: STARTTLS
Authentication method: ‘Normal password’
If you choose to use domain-branded server names, such as mail.your-domain or imap.your-domain, the secure connection may throw a certificate warning due to a common name mismatch. This can be safely trusted and your connection will remain secure.