How do I setup mailbox in Outlook (New) with IMAP Email Account?

This article covers how to setup your QuantaTec IMAP email account up in Microsoft’s “New” Outlook program, upon launching it for the first time.

Outlook (New) is not to be confused with the better known Outlook that has been in circulation since 1997, as it is a separate free program that is included with Windows 11.

If you want to set up your email account on OLD Outlook Desktop, please follow the link below:
https://www.quantatec.ltd/support/how-do-i-setup-mailbox-in-outlook/

Instructions

  1. Open the Outlook (New) app.
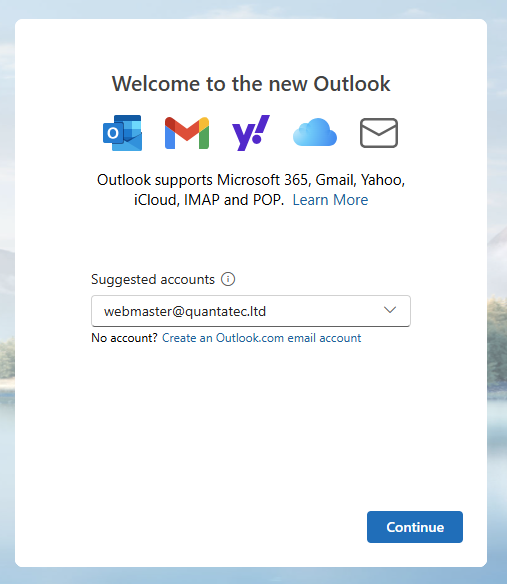
  2. Enter your email address when presented with the “Welcome to new Outlook” screen.
  3. Click Continue.
  4. A “Setting things up” screen will show, before returning you to the initial page.
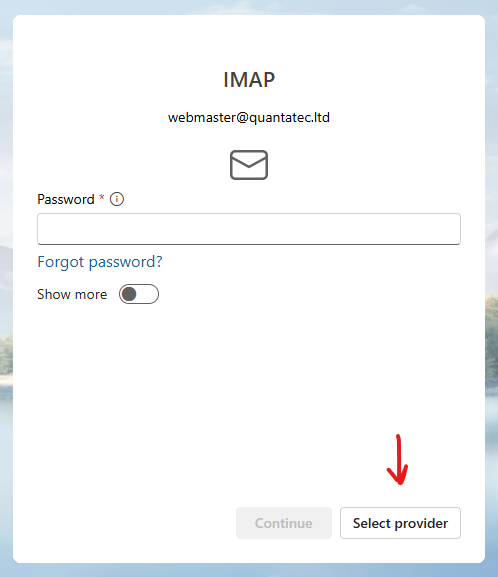
    Click Advanced Setup or Select provider.
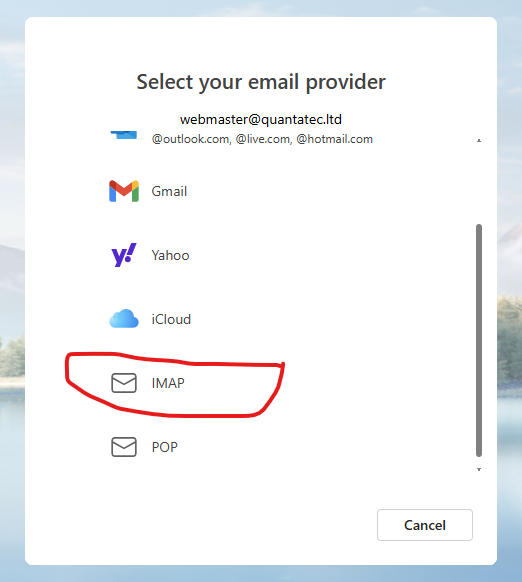
  5. Scroll down and click on IMAP.
  6. Enable the Show More option.
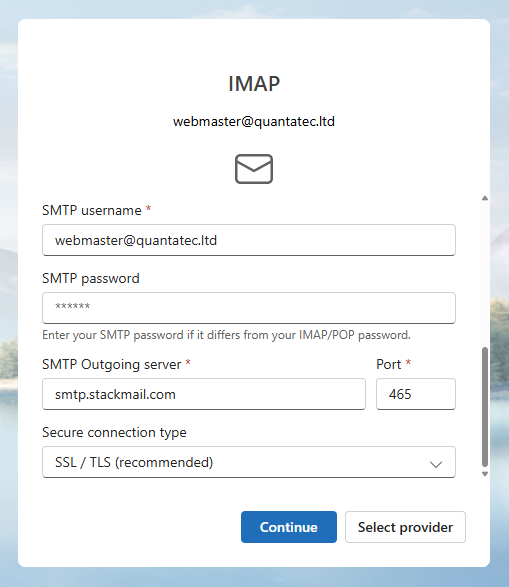
  7. Fill out the details with the correct connection settings for your account (these will have been provided to you upon completion of your migration or mailbox creation)

    Incoming mail server: imap.stackmail.com
    Incoming server port (IMAP): 993
    Use the following type of encrypted connection: SSL/TLS


    Outgoing mail server: smtp.stackmail.com
    Outgoing server port (SMTP): 465
    Use the following type of encrypted connection: SSL/TLS


  8. Click Continue to sync your emails to the Microsoft cloud.
    (This is a requirement on Microsoft’s end for using this app, and has no relation to QuantaTec’s services).
  9. A message saying “Waiting for IMAP” and “Setting things up” will display briefly.
  10. A message regarding Microsoft’s privacy policies will display – click Next to proceed.
  11. Select whether or not to send Microsoft your usage data, then click Accept.
  12. A message regarding “connected experiences” will be presented – click Continue to proceed.
  13. Another message regarding applying language, time and theme settings will be displayed. Click Apply Settings or Skip to proceed.
  14. You will finally be taken to the main Inbox view of your email account, where you can now manage your emails.

Back up your emails using Outlook

If you are using IMAP account and want to back up your email messages, you can export them to a .pst file that you can restore later as needed.

1. Select File > Open & Export > Import/Export

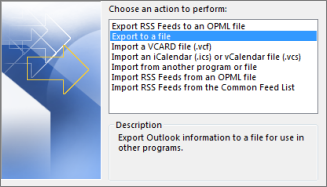
2. Select Export to a file, and then select Next

3.Select Outlook Data File (.pst), and select Next

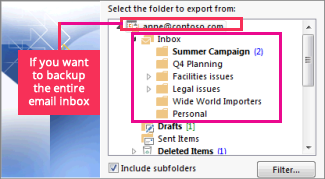
4. Select the mail folder you want to back up and select Next

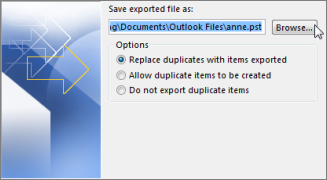
5. Choose a location and name for your backup file, and then select Finish

How do I connect to my mailbox through Outlook for mobile?

Here’s how to set up a mailbox on a mobile device using Outlook. You can get Outlook for Android here, and Outlook for iOS here,

Firstly, you will need to open the Outlook app on your mobile device.

Enter the email address of the mailbox that you would like to use on the device and select Add Account

Select the type of mailbox that you’d like to use – in this case, select ‘IMAP’, under Advanced.

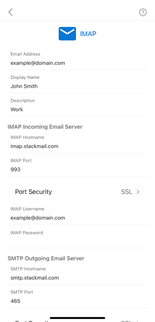
Enter the configurations as shown below:

Email Address: example@yourdomain.com
Display Name: Your name
Description: Enter any description that matches how you want to use the mailbox

Incoming mail server: imap.stackmail.com
Incoming server port (IMAP): 993
Use the following type of encrypted connection: SSL

Outgoing mail server: smtp.stackmail.com
Outgoing server port (SMTP): 465
Use the following type of encrypted connection: SSL/TLS

IMAP/SMTP Username: example@yourdomain.com
IMAP/SMTP Password: Mailbox Password

Note: If you are looking to configure Outlook on your Desktop or Laptop, please see How do I set up my mailbox in Outlook?

How to set up an IMAP account in Windows Mail

Step 1

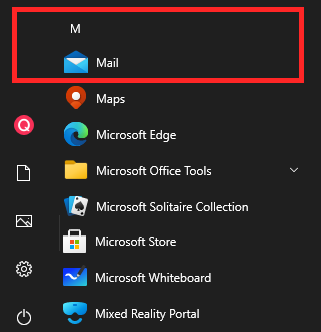
Firstly, you’ll need to open Windows 10 Mail by clicking on the Start button, then clicking on ‘Mail‘.

Step 2

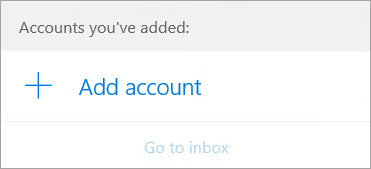
If this is the first time you’ve opened the Mail app, you’ll see a Welcome page. Select Add account to get started.

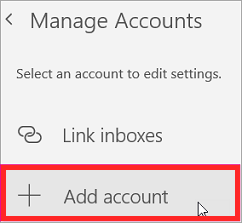
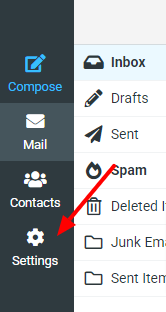
If you’ve used the Mail app before, at the bottom of the left navigation pane, select Settings  , and then choose Manage Accounts.

Note: On a phone or tablet, tap the three dots at the bottom of the page to access Settings.

Step 3

Select Add account.

Step 4

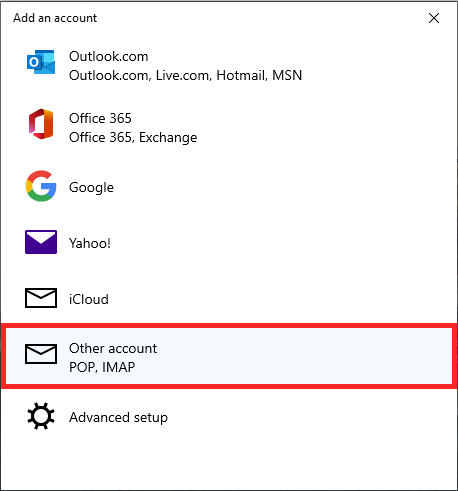
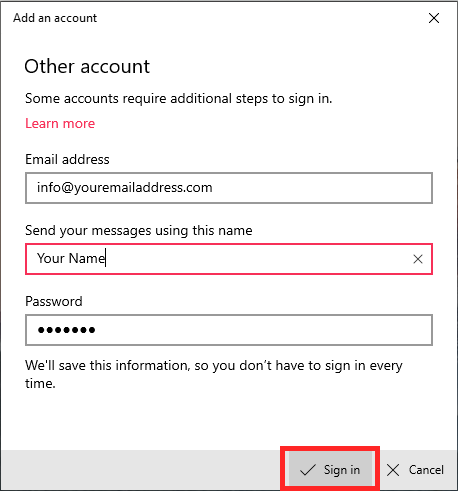
Choose Other Account – POP IMAP.

and enter your email address, name and password.

Click on Sign in and you should have access to your email account in few seconds.

If, for some reasons, the above process fails.

You will need go back and select Advance settings from the ‘Add an account‘ section.

Select Internet Email – POP or IMAP

and fill the details as per the instruction below.

Click on Sign in and you should have access to your email account in few seconds.

Additional Notes:

There are various methods of connecting to mailboxes on our platform. We always recommend IMAP as that helps keep messages in sync between various devices and our webmail system.

This is our recommended configuration for Windows Mail.

Incoming Server 

Server Name: imap.stackmail.com
Username: Your e-mail address
Port: 993
Connection security: SSL/TLS
Authentication method: ‘Normal password’

Outgoing Server (SMTP)

Server Name: smtp.stackmail.com
Username: Your e-mail address
Port: 587
Connection Security: STARTTLS
Authentication method: ‘Normal password’

If you choose to use domain-branded server names, such as mail.your-domain or imap.your-domain, the secure connection may throw a certificate warning due to a common name mismatch. This can be safely trusted and your connection will remain secure.

Create an HTML Email Signature for iPhone

How to add a signature on iPhone

  1. On the iPhone, open the Settings app.
  2. Swipe down and choose Mail.
  3. Swipe down and tap Signature.
  4. Type your new signature text (this can be done for all accounts or on a per account basis).
  5. Select Mail.

Add formatting, imagery and dynamic HTML in your iPhone signature

Note: This will also work if you’re using an iPad.

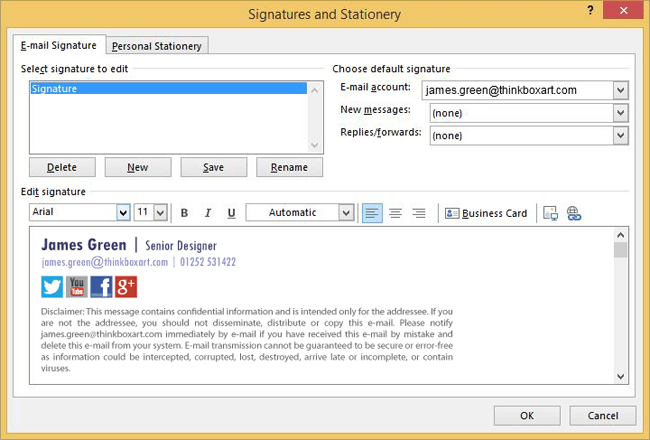
Create your email signature in an email client that supports HTML e.g. Outlook or Gmail. Make sure you add content such as your logo, social media icons and legal disclaimer.

An email signature designed in Microsoft Outlook.

Send a blank message with the new HTML email signature to your iPhone.

A blank mail with the previously created iPhone email signature.

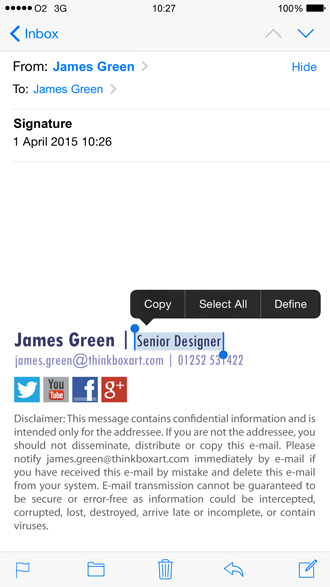
Open the email you sent to your iPhone. Find a part of the signature text that is not a web or email link. Press and hold this text.

A section of the text is highlighted using the press and hold feature built into iOS.

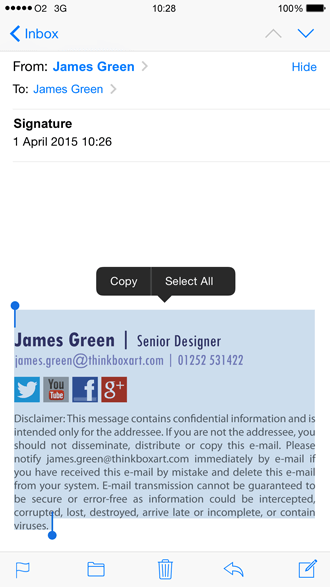
The context menu will appear over the text. Tap Select All, then Copy.

The iPhone email signature body is highlighted.

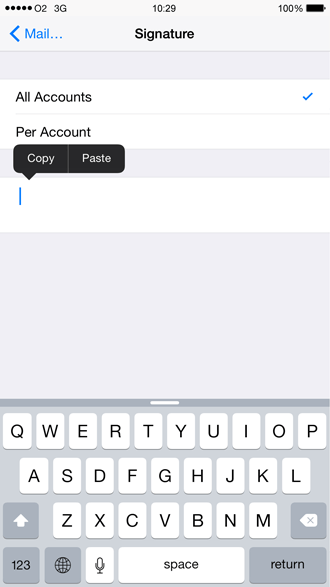
Go into the iPhone email signature editor by going to Settings > Mail, Contacts, Calendars > Signature.

Delete any text, tap and hold the screen until the context menu appears, and select Paste.

The Context menu is triggered using the press-and-hold gesture.

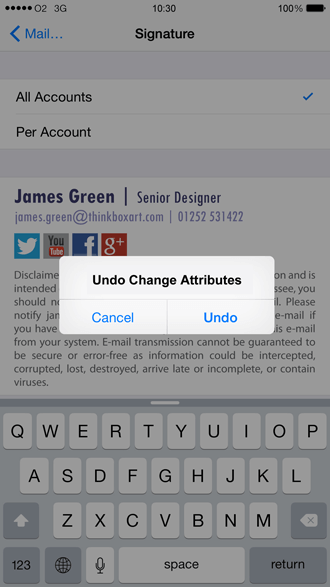
The new email signature will now appear in the editor. The original formatting will have been lost and it will appear slightly altered – this is normal so don’t panic! iOS automatically adds its own coding to the HTML source of the email signature. All you have to do is shake your iPhone to trigger the Undo Change Attributes context menu and select Undo.

Undo the Change Attributes menu activated by shaking the iPhone.

You’ve now successfully removed the additional iOS formatting.
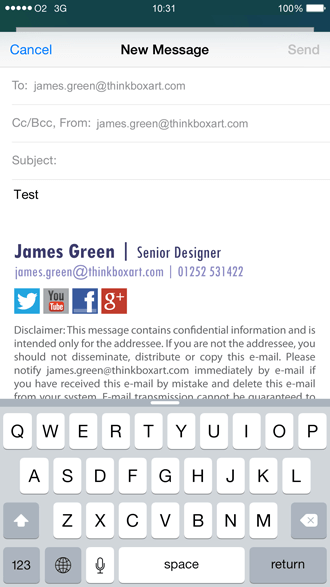
Go into the iPhone Mail app to see your new HTML email signature in all its glory. You’ll want to test it thoroughly before sending out any emails to other recipients.

Always remember to thoroughly test an iPhone email signature.

This process only works for one mobile device at a time.

How do I setup mailbox in Thunderbird Mail client?

There are various methods of connecting to mailboxes on our platform. We always recommend IMAP as that helps keep messages in sync between various devices and our webmail system. This is our recommended configuration for Thunderbird mail clients.

Incoming Server (“Account Settings” > “Server Settings”)

Server Name: imap.stackmail.com
Username: Your e-mail address
Port: 993
Connection security: SSL/TLS
Authentication method: ‘Normal password’

Outgoing Server (SMTP)

Server Name: smtp.stackmail.com
Port: 587
Connection Security: STARTTLS
Authentication method: ‘Normal password’
Username: Your e-mail address

If you choose to use domain-branded server names, such as mail.your-domain or imap.your-domain, the secure connection may throw a certificate warning due to a common name mismatch. This can be safely trusted and your connection will remain secure.

How do I set up email on my Android device?

Here’s how to set up an email account on an Android phone or tablet:

  • Open the mail application on your Android device.
  • Select Add New Account and enter the email address and it’s password.
  • Select Manual Setup and select IMAP Account.
  • The User name will need to be the same as the email address.
  • Enter imap.stackmail.com as the IMAP Server, change the Security Type to SSL, Port 993 should then be used.
  • Enter smtp.stackmail.com as the SMTP Server, change the Security Type to SSL, Port 465 should be added.
  • The outoing mailserver User name and Password are the email address and password for your mailbox.
  • Select Sign In and the mailbox will be added to your Android.

How do I add a DKIM record?

DKIM, like SPF, is a standard that enables a specific aspect of the email sending process to be authenticated. The premise of DKIM is to check that an email is really from the domain or sender that it said it was sent from and if it has been altered in any way in transit.

Specifically, DKIM (DomainKeys Identified Mail), provides a foundation for distinguishing legitimate mail. A DKIM signature is placed in the header of emails sent by our mail servers, so that the receiving mail server can then validate the signature using a public cryptographic key (2048 bit). It’s added as a TXT record in the Manage DNS section for the domain name.

DKIM does not outright mean all emails will be delivered. However, it does provide the receiving mail server with further information so it can make a more informed decision on the best way to handle the email.

To add one:

  • Head to Manage Hosting and ‘Manage’ the package you want to add a DKIM record.
  • Select the DomainKeys icon.

Firstly, we’ll explain how to add a simple DKIM record to your DNS.

  • Ensure you’ve selected the domain you want to add the DKIM record-to.
  • Add a Selector. This can be any value or name you like. It’s simply a field to identify the DKIM record. Then select Add Signature.

DKIM signatures

  • If your nameservers are with QuantaTec, we’ll automatically add the correct TXT record for you.

TXT record

The signature will be added immediately to emails sent from the mailboxes under the domain selected. We will have automatically added a DNS record to Manage DNS. You may wish to wait for this to resolve for DKIM to be effective.

From here you’re all done: your emails will use DKIM as a method to authenticate email.

You can also use the Advanced Options section.

Note: This is only recommended if you’re familiar with customising DKIM signatures. Below is a description of each section and how it alters the DKIM signature that’s added to the header of emails sent.

Add DKIM signature

Selector – This is a unique identifier for the DKIM record and can be set to any value you like. For example you could set it to indicate the name of an office location or the signing date (e.g. “october2019”).

Granularity/Identity – By default this is set to a wildcard value: ‘*’. You can use this field to set the DKIM record to be assigned to a specific mailbox, allowing you to constrain which mailbox can use this selector legitimately. For example, if you set the value of this field to be ‘sales’, only your sales@domain.com mailbox will use this DKIM signature. This field must match the local part of the signing address (mailbox).

Note – This field does not form part of the DKIM record or signature and is simply there so you can record any information about this record for your own information.

Service Type – Currently, DKIM only supports signatures added to messages sent via ‘Email’ (i.e. SMTP). However, in the future the DKIM standard may add more service types such as IM or VoIP, which we’ll then be able to support. This field can be left to either ‘*’ or ‘Email’ – changing this won’t influence behaviour at present.

Canonicalization – Some mail servers and relay systems may modify an email in transit, potentially invalidating a DKIM signature. There are two options you can set: ‘Simple’ and ‘Relaxed’. If you expect your email to be modified in any way, you should select Relaxed which is more forgiving to changes made the header and body of the email.

Expiry Time – This is the time which, when elapsed, the DKIM signature will be invalidated in the mail header. By default it’s set to 86400 seconds (1 day). You may wish to extend this if you believe deliverability of the email will take longer than 1 day.

Flags – There are two flags available: ‘Production’ and ‘Testing’. If you select Testing, you’ll still receive a response to the email and the DKIM signature from the remote mail server, but the email won’t be treated with different behaviour. Verifier systems may wish to track testing mode results to assist the signer. You’ll mostly want to use Production.

What is an SPF Record and how to add one?

A Sender Policy Framework (SPF) record is a type of Domain Name Service (DNS) TXT record that identifies which mail servers are permitted to send email on behalf of your domain.

Sender Policy Framework (SPF) record is a security measure to block unsolicited/unwanted email (spam).

It is an email validation protocol to detect and block email spoofing (impersonating).

This is prevented by providing a mechanism to allow receiving mail servers to verify that incoming mail from a domain comes from an IP Address authorised by that domain’s administrators.

SPF records help reduce the chance of your domain being spoofed in spam messages. It can also increase the deliverability of e-mail to external providers such as Gmail and Outlook.

We maintain an SPF record that is kept up to date with all IP addresses used to transmit e-mail from our network. This ensures that any e-mail sent from our services passes an SPF check.

SPF records are automatically added to all our hosting packages domains. 

If you have an additional or external domain, to use this on your domain, you need to add a TXT record in DNS.

Manage DNS section

Towards the bottom of the Manage DNS page you will see 3 inputs to allow you to add new records. To add it:

  • Leave the Name field blank
  • Select TXT for Type
  • Enter v=spf1 include:spf.stackmail.com a mx -all as data

Then save the changes. Your domain is now protected by an SPF record.

How do I add another server/include to an SPF record?

If you’re using QuantaTec mail server but want to route emails via another provider – such as G Suite, Office 365 or Mailchimp – you may need to add a secondary sending server source to the SPF record.

You can do this by specifying multiple includes within the TXT record within Manage DNS. Each include is separated by a space and if any one include should fail, the SPF mechanism will simply move on to the next one. Below are some common providers you may need to add to your SPF record.

QuantaTec’s default SPF record: 

v=spf1 include:spf.stackmail.com a mx -all

To include a secondary include, you can edit the record:

G Suite

v=spf1 include:_spf.google.com include:spf.stackmail.com a mx -all

Office 365

v=spf1 include:spf.protection.outlook.com include:spf.stackmail.com a mx -all

Mailchimp

v=spf1 include:servers.mcsv.net include:spf.stackmail.com a mx -all

SendGrid

v=spf1 include:sendgrid.net include:spf.stackmail.com a mx -all